Introduction
This question comes up regularly. How do you enable the Web GUI locally on a device? As part of our device management and security policies by default the Advanced Provisioner App automatically disables local level Device Web GUIs to prevent end-users from accessing it. There are a TON of settings and features that during our interop testing process we disable or change, and generally speaking we don’t want end-users gaining access to possibly change them. These changes could cause issues with the usability of the device on the platform, and/or possible security risks.
Still we do understand from time to time you will need to gain access to the device level Web GUI. So this simple little how to article will provide instructions on how to do so.
Additionally, you will need to know the default username and password for the interface, which is changed at the time of device provisioning. To get these details please open a support ticket.
Step 1 – Access Advanced Provisioner
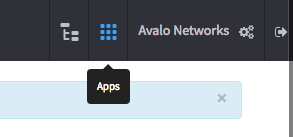 You will first need to access the customer’s account the device you want to manage is located on. Afterwards you will need to switch over to the Advanced Provisioner app via the “App Dock”. You can access the App Dock by selecting the “App Dock” icon in the upper right hand corner of the screen, as noted above.
 Once the App Dock is open, select the
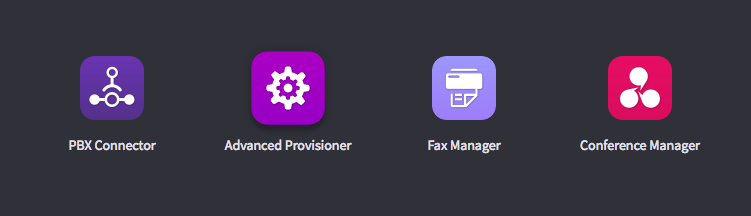
Advanced Provisioner Icon. This will switch your application view to the Advanced Provisioner.
Now we should caution you, the Advanced Provisioner App is a very POWERFUL application which can and will effect your customer’s devices in a nearly instant fashion. If you need assistance or have questions, PLEASE CONTACT SUPPORT.
Step 2 – Managing Device Config
Now that you have accessed the Advanced Provisioner Application, your screen should look something like below:
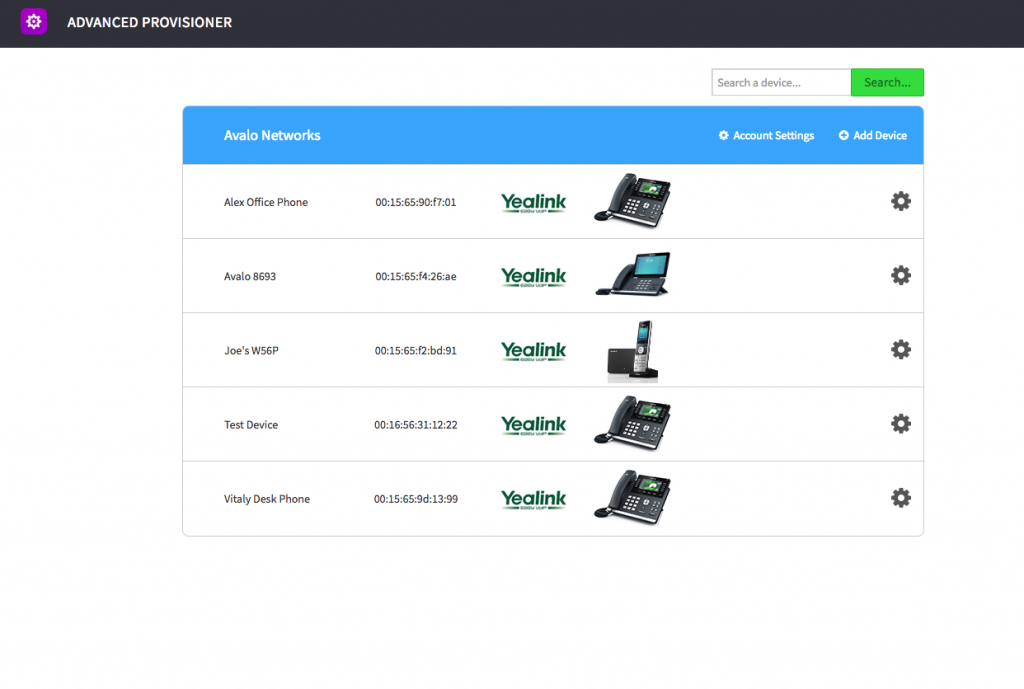
 Each of the devices provisioned to the
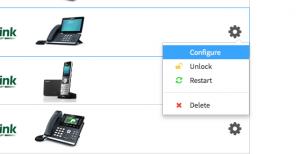
account will be listed here. For this example, we are going to be working with a Yealink T56a, however the process is basically the same for any device brand and model managed by the platform. Your next step you will need to select the device you wise to edit. This can be done by click on the “Gear” icon next to the device listing, after doing so, a sub-menu of options will appear. Click on the option labeled “Configure”.
Step 3 – Enabling HTTP Access
 The next and final step is very easy. Once you have gained access to the device’s configuration, you need to navigate to the “Settings” tab. There you will find a section
labeled “HTTP”. By default the HTTP and HTTPs options will be set to “Disabled” change both to “Enabled”. Then at the bottom of the screen click on the green save button.
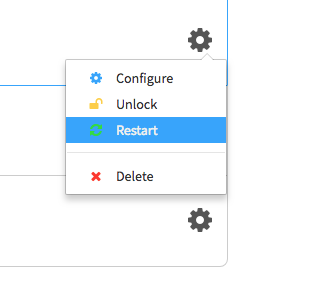 Then Afterwards, you will need to restart the device you just edited. You can do this by simply power cycling the device, or by issuing a remote reboot command by again clicking on the “Gear” icon as you did in Step 2, but instead selecting the “Restart” Option.
This will issue an “NOTIFY” SIP message to the device which will cause it to do a resync. For most devices this will cause it to reboot after downloading a fresh copy of the configuration. In some cases (Mainly the Grandstream Devices) the resync message will cause the device to pull a new configuration, but WILL NOT cause it to reboot. In these use cases the device will automatically update the config, and if not, you may need to manually power cycle the device.
Conclusion
After you have completed the above steps, you should be able to access the device’s local GUI by entering the IP address of the device into a web browser of a computer located on the same local network. Again you will need the admin username and password. If you do not have these, please contact support.