This is a guide to auto-provision an Obihai excluding the 100 series.
Steps to Auto Provision device
- Add Device
- First add the device into the account you are going to provision it against. It does not need to be assigned to a user, but it will need to be enter.
- Reset to Factory Settings
- Please also make sure that you have reset your device to factory settings. To do so, navigate to the “Settings” menu and “Factory Reset” would appear as a soft key. Push it and it’ll ask for the admin password (“admin” is the default password).
- Obtain the IP Address
- The IP address for a Obihai device can be found on the device itself. In order to provision a Obihai phone, you will first need to get its IP address in order to access the phone’s web interface.
- The IP address on OBi10xx devices can easily be found by navigating to the “Settings” menu on the phone. You should see a line with the word “Network” and below an IP address. Please make sure that your device jack is plugged in. If it is not plugged in, it will read IP:
0.0.0.0. - On OBi20x, OBi30x and OBi50x, pick up the handset to the ATA and dial “ * “, dial 1 at the promt and you will hear the IP address spoken out. If you need to repeat the IP address, just press 0.
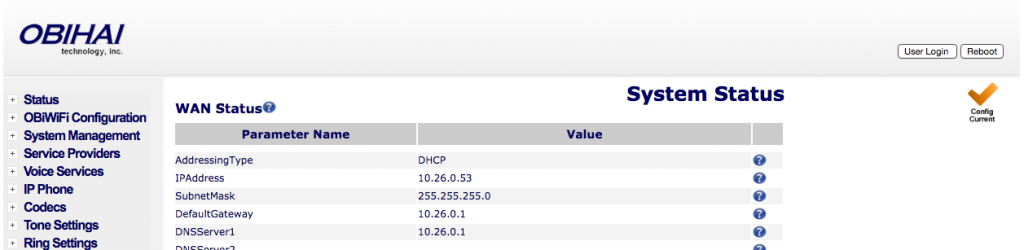
- Enter the IP Address and Login
- In your browser, enter this IP address. When logging in for the first time, the default username is admin and password is admin.
- The page should look something like this:
Autoprovision Device
- Most of the information as you will see has already been pre-populated. You’ll need to click on System Management on the side, then click on Auto Provisioning. Uncheck the “Default” checkbox for the “ConfigURL” field under ITSP Provisioning and input the provisioning URL
http://pf.avpnet.us/$DM.xml.
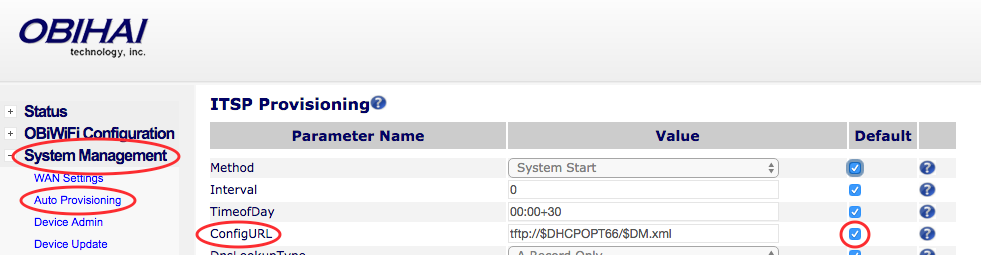
Please ensure there are no extra spaces or characters in this field. Click “Submit” on the bottom of the page, then the Reboot button on the top right.

This may take up to a few minutes, but if done correctly, you’ll notice your device reboot as it is provisioning. Next you should see it registered to the platform.