Before you can complete the steps in this article be sure you have setup the device in Flex UC within an account, otherwise the device risks the chance of being blocked by our firewalls.
Steps to Provision the Device
If the device is not brand new, or has been provisioned on another platform or Flex UC account, you will need to factory reset it. Below are the generalized steps in order to complete a factory reset on a Polycom device. These steps may differ depending on the firmware version, so we always suggest that your research the suggestions method to return a device to it’s factory defaults at http://www.polycom.com.
Steps to complete a general factory reset
Step 1:
Access the menu on the phone. This can normally be done by pressing the menu button.
Step 2:
Then Select the follow Options:
- Select 3: Settings
- Select 2: Advanced (Password 456)
- Select 1: Admin Settings
- Select 5: Reset to Defaults
- Select 5: Reset To Factory Settings
At this stage the device should reboot and start the factory default process. This will take some time upwards of 30 minutes to complete, and may require that the phone reboots several times. Once complete the phone will boot and come to a blank screen. Depending on the firmware version it may say no service.
Gaining Local Area Network Access
In theory the device should be defaulted to use DHCP you can check this by completing the following Steps:
- Press The Menu Button
- Select Status
- Select Platform
- Select Phone
At this point the phone should give you a Network IP Address, if the phone reads an IP of 0.0.0.0 then check the network connection, and ensure that the network you are using has DHCP services.
BE SURE TO RECORD THE IP ADDRESS you will need it later.
Gaining Access to the Phones Web Browser
Next we need to access the phone’s web browser in order to complete the provisioning process. You will need the IP address to got from the previous stage. To access the phone’s web browser from a computer on the same network complete the following steps:
Step 1:
Enter the IP address of the phone into your web browser.
The Default Password should be 456.
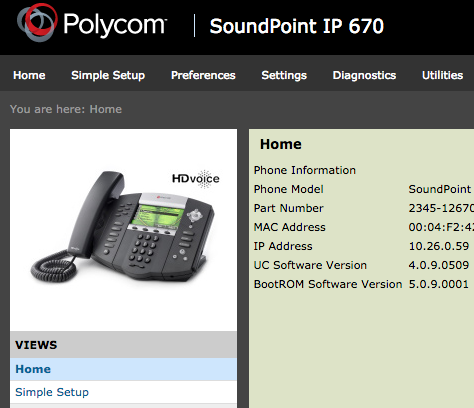
After gaining access you should see something like this:

Step 2:
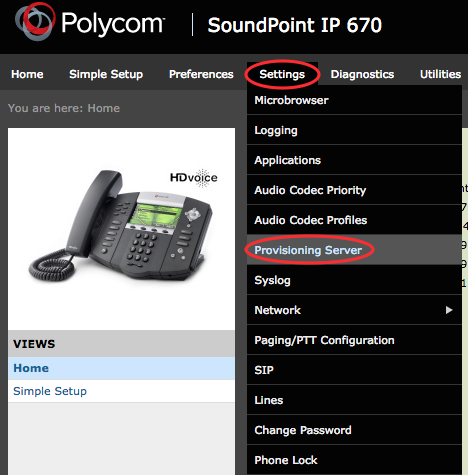
Next we need to access the auto provisioning features on the phone, by clicking on to “Settings” in the top tab and then select “Provisioning Server.”

NOTE: If you do not have these options, then your device is are running on a hardware and firmware version which is not compatible with our platform. We do NOT suggest using this device even if manually provisioned since it poses a major security risk.
Step 3:
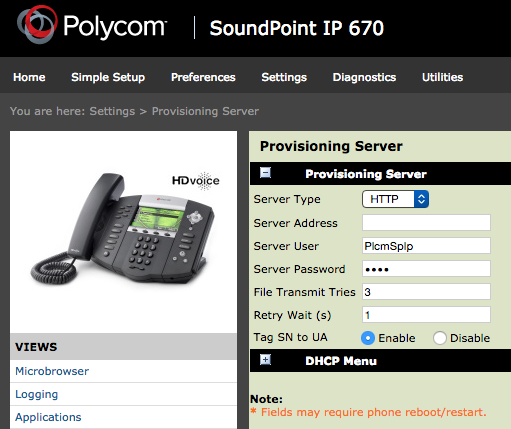
Next you will need to enter the provisioning server details into the phone. Here is the information you will need:
- Server Type: Select “HTTP” from the drop down
- Server Address: set to pf.avpnet.us with out the http
- Tag SN to UA: MUST be set to Enable

You can leave the Server User and Password as they are since our provisioning method just ignores them.
Finally Save changes. The phone should reboot, if not then try manually rebooting the phone.
After the phone reboots it should be provisioned on our network. Note that it may reboot several times.
You will also be able to see the device registered on the account. Also it should be noted that access to the device’s web interface is disabled at this stage and we do not suggest enabling it for any reason since nearly all functions of configuring the device and be handled via the Advanced Provisioner App.
